Getting Solid with Solidity: A Comprehensive Guide to Ethereum Development with Hardhat
Short Recap
In the previous article, we learned about the basics of Ethereum, Web3, and ethers.js. We also learned how to interact with the Ethereum blockchain using ethers.js using ABI,Contract Address, and Provider Or Signer. In this article, we will learn about Solidity and Hardhat.
Introduction
It is so tedious and costly to deploy a smart contract on the Ethereum blockchain and then realize that there is a bug in the contract. We’ll need to deploy so many contracts with different hash till we get the correct outcome. This is where Hardhat comes into play.
What does Hardhat do? 🤔🤔
- Hardhat is a development environment to compile, deploy, test, and debug your Ethereum software.
- It helps you to write, compile, deploy, and test your smart contracts.
- It also helps you to write scripts to automate your development workflow.
- It also helps to run your own local Ethereum network to test your smart contracts.
There are other tools as well like Truffle and Remix, but Hardhat is the most popular tool for Ethereum development.
I personally prefer Hardhat and Remix for Ethereum development.
What is Solidity?
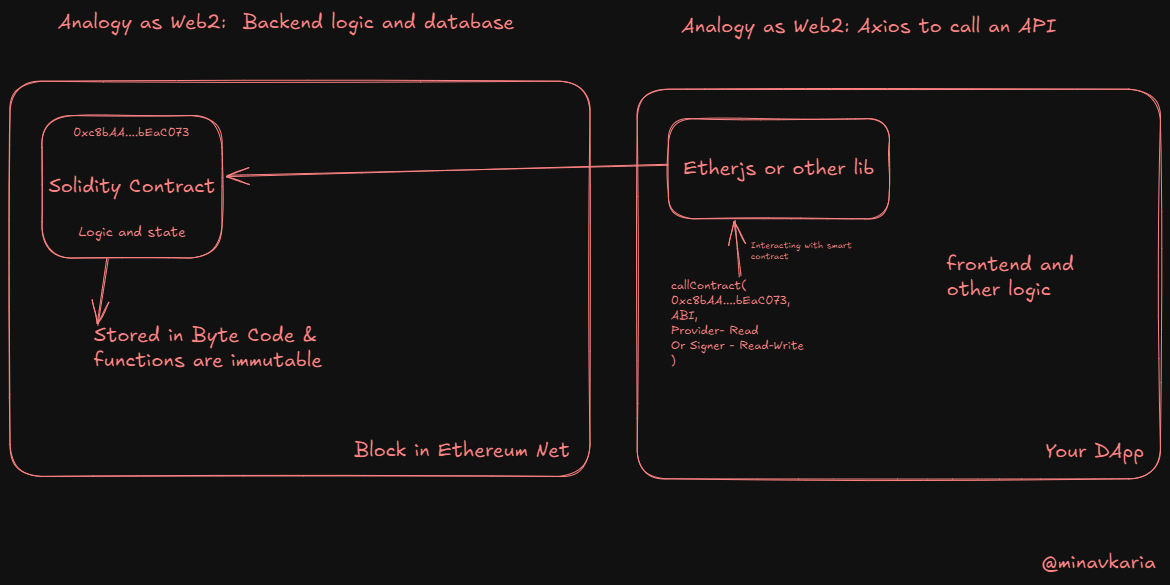
Solidity is a statically-typed programming language designed for developing smart contracts that run on the Ethereum Virtual Machine (EVM). It is influenced by C++, Python, and JavaScript and is designed to target the EVM.
It is basically a backend logic for your Web3 application, which has single storage, single memory, and single stack. It is used to write smart contracts on the Ethereum blockchain.
If you are familiar with JavaScript, then you will find Solidity easy to learn. Solidity is a high-level language that is statically typed, supports inheritance, libraries, and complex user-defined types among other features.
Setting up Hardhat
First, you need to have Node.js installed on your system. You can download it from here.
After installing Node.js, you can install Hardhat using npm. Run the following command to make your first Hardhat project.
First make a new directory for your project and navigate to that directory.
1
2
mkdir my-first-hardhat-project
cd my-first-hardhat-project
Now, run the following command to initialize your Hardhat project.
1
npx hardhat init
This will show you the following options:
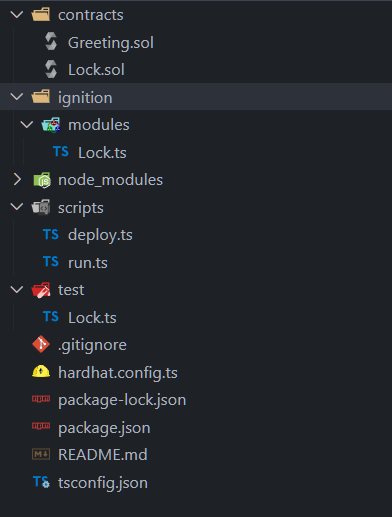
Choose your option and press enter. This will create a new Hardhat project in your directory which will look like this:
We created scripts folder for our scripts to be return in it like deploy.js and run.js.
The folders and files in the project are as follows:
- contracts: This folder contains the Solidity smart contracts.
- scripts: This folder contains the scripts to automate your development workflow.
- test: This folder contains the tests for your smart contracts.
- hardhat.config.js: This file contains the configuration for your Hardhat project.
- ignition: This folder is used simplify the process of deploying and managing smart contracts in Ethereum projects.
Now, it is self-explanatory that you can write your Solidity smart contracts in the contracts folder and write your scripts in the scripts folder.
Starting our Local Ethereum Network
You can run your own local Ethereum network using Hardhat. This is useful for testing your smart contracts locally before deploying them on the Ethereum mainnet.
Run the following command to start your local Ethereum network.
1
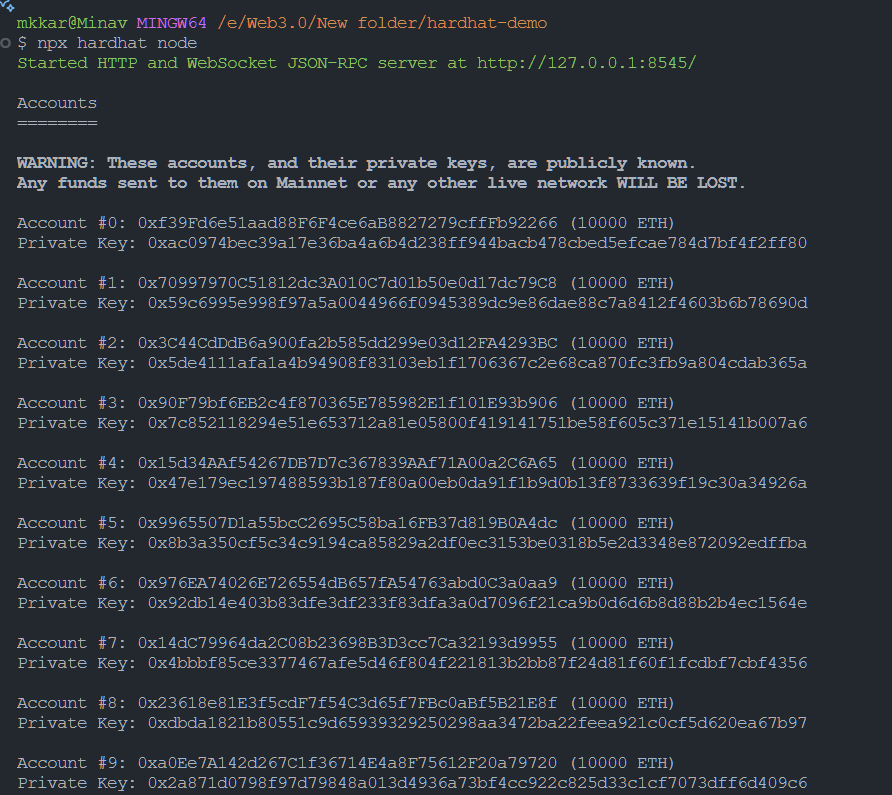
npx hardhat node
This will start your local Ethereum network and show you the accounts and private keys present in the network with temporary Ethereum balance.
Note: Keep this terminal open as this is your local Ethereum network.
Writing our First Smart Contract
Let’s write a simple Solidity smart contract in the contracts folder as Greeting.sol.
1
2
3
4
5
6
7
8
9
10
11
12
13
14
15
16
17
18
19
// contracts/Greeting.sol
// SPDX-License-Identifier: MIT
pragma solidity ^0.8.0;

contract Greeting {
    string greeting;

    constructor() {
        greeting = "Hello, Minav!";
    }

    function greet() public view returns (string memory) {
        return greeting;
    }

    function setGreeting(string memory _greeting) public {
        greeting = _greeting;
    }
}
Note: This is code is Solidity code and not JavaScript code, my editor isn’t able to highlight Solidity code.😅
Doesn’t it look like JavaScript? 😄
Doesn’t it look easy to write? 😄
Let’s see what this contract does:
- It has a state variable
greetingwhich is a string. - It has a constructor that sets the value of
greetingto “Hello, Minav!”. - It has a function
greetthat returns the value ofgreeting. - It has a function
setGreetingthat sets the value ofgreeting. - The
viewkeyword is used to specify that the function does not modify the state of the contract. - The
memorykeyword is used to specify that the value is stored in memory. - The
publickeyword is used to specify that the function can be called from outside the contract. - The state we were talking about is the state of the contract, which is stored on the blockchain. Here, the state variable
greetingis stored on the blockchain.
Now, let’s write a script to deploy this contract in the scripts folder.
1
2
3
4
5
6
7
8
9
10
11
12
13
14
15
16
17
18
19
20
21
22
23
// scripts/deploy.ts
import hre from "hardhat";


async function main() {
  try {
    // Get the ContractFactory of your SimpleContract
    const SimpleContract = await hre.ethers.getContractFactory("Greeting");

    // Deploy the contract
    const contract = await SimpleContract.deploy();

    console.log("Deploying contract...");
    await contract.waitForDeployment();
    console.log(`SimpleContract deployed to: ${contract.target}`);

  } catch (error) {
    console.error(error);
    process.exit(1);
  }
}

main();
Now, run the following command to deploy the contract.
1
npx hardhat run scripts/deploy.ts --network localhost
This will deploy the contract and show you the address of the deployed contract.
By Default, Hardhat runs on the localhost network. You can also run it on the sepolia network by specifying the network or changing the network in the hardhat.config.js file.
This is how you can write Solidity smart contracts and deploy them using Hardhat.
 This is the output of the command. It shows the address of the deployed contract.
 This is the output of the local Ethereum network. It shows the contract that we deployed.
Let’s save the contract address 0x5FbDB2315678afecb367f032d93F642f64180aa3 for future use to interact with the contract.
Interacting with the Smart Contract
Now, let’s write a script to interact with the smart contract in the scripts folder.
We have ethers object from hardhat which we can use to interact with the contract.
We use the getContractAt method to get the contract instance using the contract address which we saved earlier 0x5FbDB2315678afecb367f032d93F642f64180aa3.
We use the methods from the contract instance to interact with the contract. We can call the greet method to get the current greeting and the setGreeting method to set the new greeting.
1
2
3
4
5
6
7
8
9
10
11
12
13
14
15
16
17
18
19
20
21
22
23
24
25
26
27
// scripts/run.ts

import { ethers } from "hardhat";

async function main() {

  const contractAddress = "0x5fbdb2315678afecb367f032d93f642f64180aa3";


  const GreetingContract = await ethers.getContractAt("Greeting", contractAddress);


  const currentGreeting = await GreetingContract.greet();
  console.log("Current Greeting:", currentGreeting);

  const newGreeting = "Hello, Blockchain!";
  const tx = await GreetingContract.setGreeting(newGreeting);
  await tx.wait();

  const updatedGreeting = await GreetingContract.greet();
  console.log("Updated Greeting:", updatedGreeting);
}

main().catch((error) => {
  console.error(error);
  process.exitCode = 1;
});
Deploying to the Sepolia Testnet
Now, let’s deploy the contract to the Sepolia testnet.
First you need to change the hardhat.config.js file to add the Sepolia network.
Before you set this let’s understand types of networks in Hardhat.
- Hardhat Network: This is the default network that runs on your local machine which does not persist the state of the blockchain. It is used to just test your smart contracts once before deploying them on the Ethereum blockchain.
- Localhost Network(Current using this): This is the network that runs on your local machine and persists the state of the blockchain.
- Other Networks: These are the networks like Sepolia, Rinkeby, Ropsten, etc. that run on the Ethereum blockchain.
1
2
3
4
5
6
7
8
9
10
11
12
13
14
15
16
17
18
19
20
21
22
// hardhat.config.js

import { HardhatUserConfig } from "hardhat/config";
import "@nomicfoundation/hardhat-toolbox";
import dotenv from "dotenv";

dotenv.config();

const config: HardhatUserConfig = {
  solidity: "0.8.28",
  defaultNetwork: "localhost",
  networks: {
    hardhat: {
    },
    sepolia: {
      url: "https://sepolia.infura.io/v3/" + process.env.INFURA_KEY,
      accounts: [`${process.env.MY_PRIVATE_KEY}`]
    }
  },
};

export default config;
Now, you need to create a .env file in the root directory of your project and add the following environment variables.
1
2
INFURA_KEY=YOUR_INFURA_KEY
MY_PRIVATE_KEY=YOUR_PRIVATE_KEY
You can get your Infura key from here.
You can get your private key from your wallet like Metamask.
Now, run the following command to deploy the contract to the Sepolia testnet.
1
npx hardhat run scripts/deploy.ts --network sepolia
This will deploy the contract to the Sepolia testnet and show you the address of the deployed contract.
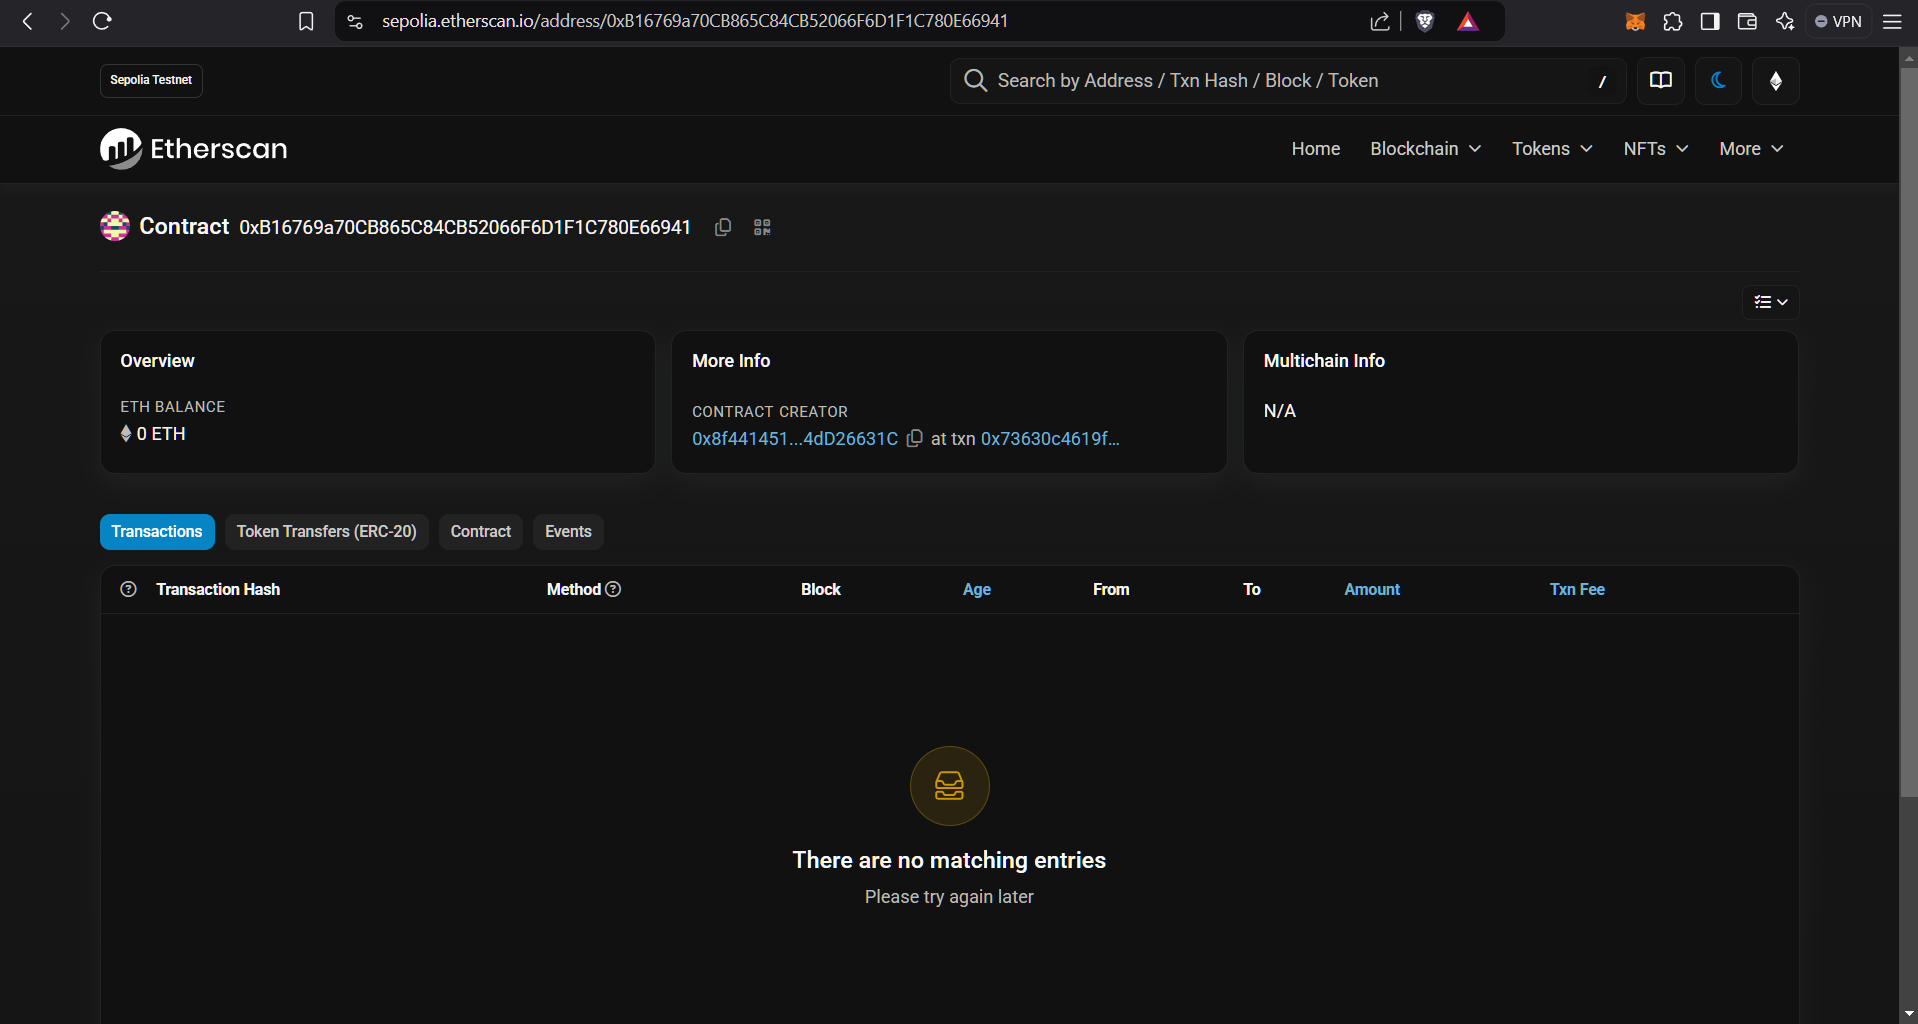
Let’s copy the contract address 0xB16769a70CB865C84CB52066F6D1F1C780E66941 . Now let’s search this address on the Sepolia etherscan to see the contract.
In the way we interacted with the contract on the local network, we can interact with the contract on the Sepolia testnet as well.
This is how you can deploy your smart contracts on the Ethereum blockchain using Hardhat.
Let’s Verify the Contract
Now, let’s verify the contract on the Sepolia testnet.
Run the following command to verify the contract.
1
npx hardhat verify --network sepolia CONTRACT_ADDRESS
Replace CONTRACT_ADDRESS with the address of your deployed contract.
This will verify the contract on the Sepolia testnet.
Verifying the contract means that you are verifying the source code of the contract on the blockchain. This is important as it shows that the contract is not malicious and can be trusted.
 This is the output of the command. It shows that the contract has been verified.
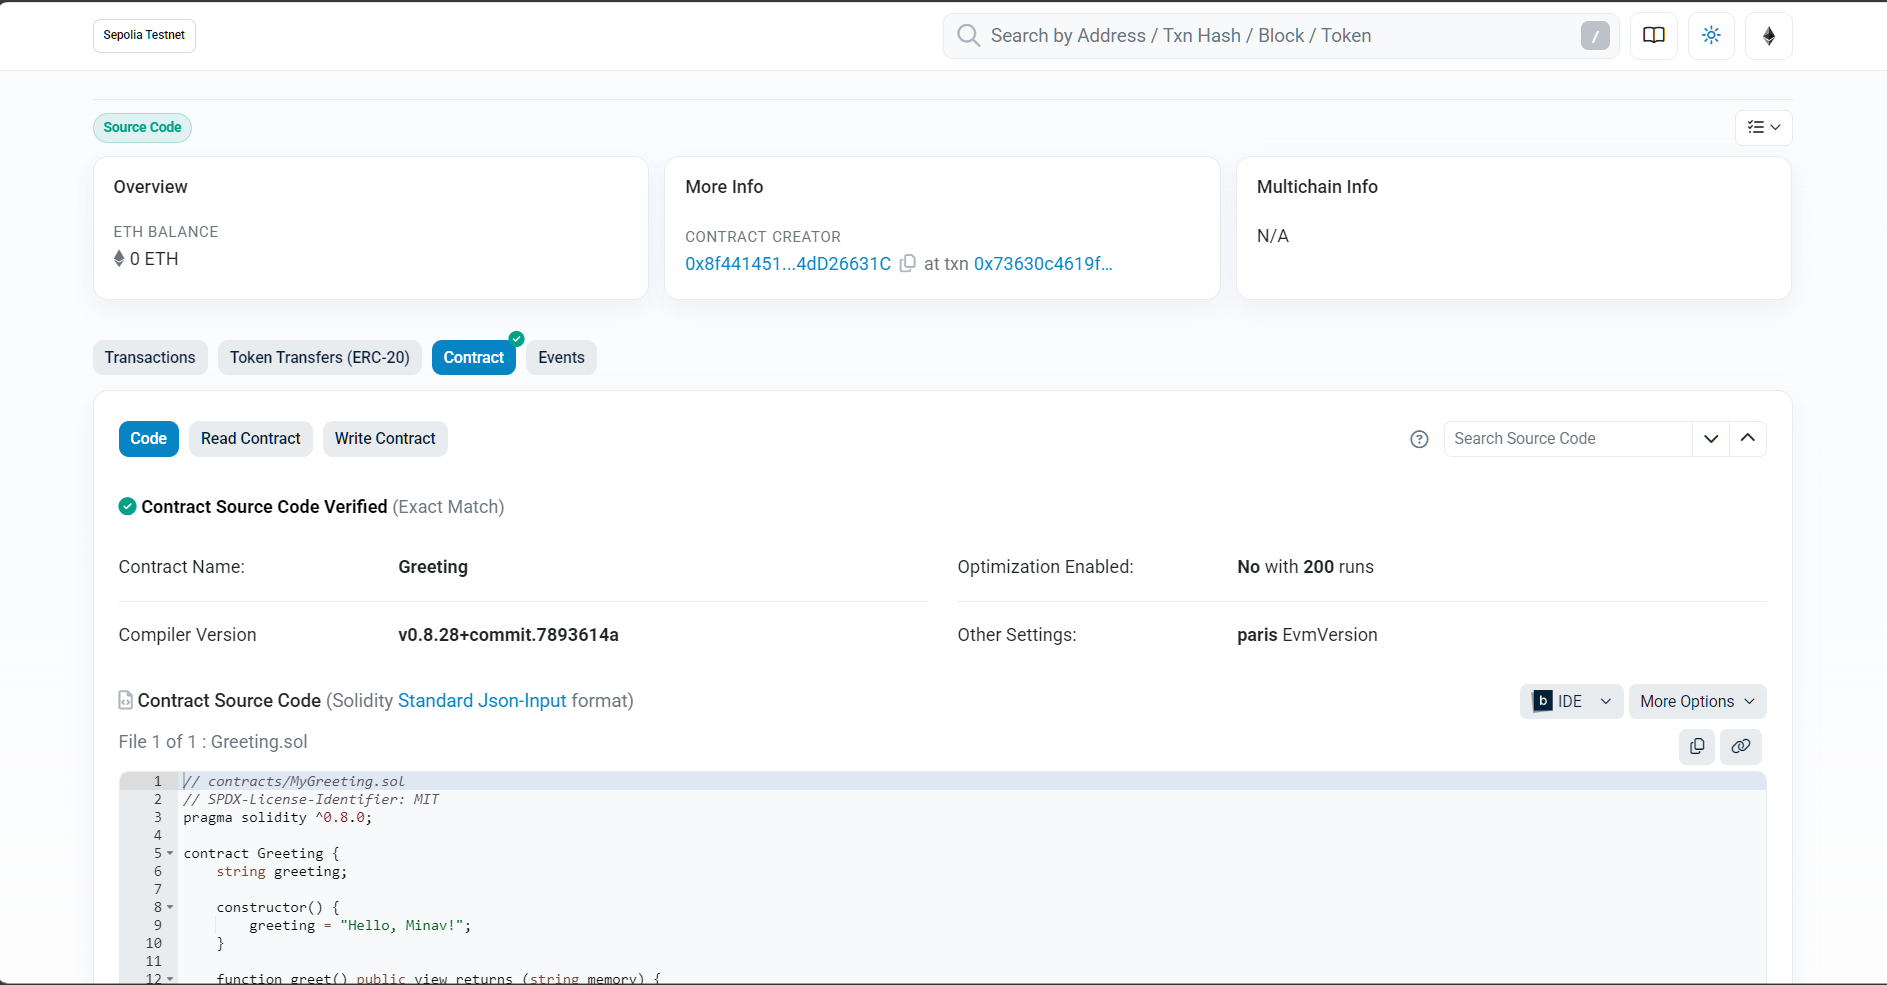 This is the output of the Sepolia etherscan. It shows that the contract has been verified.
Conclusion
In this article, we learned about Solidity and Hardhat. We learned how to write Solidity smart contracts and deploy them using Hardhat. We also learned how to interact with the smart contracts and deploy them on the Sepolia testnet.
The contract we deployed was a very simple contract. You can write more complex contracts and deploy them using Hardhat.
There are many concepts in Solidity that we did not cover in this article. You can learn more about Solidity from the official documentation.
Some important concepts in Solidity are:
- ERC20 Tokens: These are the tokens that follow the ERC20 standard.
- ERC721 Tokens: These are the tokens that follow the ERC721 standard.
- Events: These are the events that are emitted by the smart contracts.
- Modifiers: These are the modifiers that are used to modify the behavior of the functions.
- Inheritance: This is the inheritance that is used to inherit the properties of the parent contract.
- Interfaces: These are the interfaces that are used to define the functions that the contract should implement.
- Structs: These are the structs that are used to define the custom data types.
- Mappings: These are the mappings that are used to store the key-value pairs.
- Arrays: These are the arrays that are used to store the data.
- Fallback Function: This is the function that is called when the contract receives the ether.
This is just the basic introduction to Solidity and Hardhat. There is a lot more to learn in Solidity and Hardhat.
You can refer to the official Hardhat documentation and Solidity documentation for more information.
I am thinking to explore LLMs in the next article. What do you think? 🤔
Happy Coding! 🚀🚀

