Discover the Power of GraphQL: How to Use it in Your Next Project
 Image Credit: Amplicatiion
Introduction
If you are backend developer with REST API, then it’s time to switch to GraphQL. In this article, we will learn how to use GraphQL in your next project.
As a backend developer, you might be making REST API calls to fetch data from the server. REST API is a great way to fetch data from the server, but it has some limitations.
For example : You can only fetch the data that is available in the API endpoint. If you want to fetch more data, you need to make another API call. This can lead to over-fetching or under-fetching of data.
So, let’s understand it with an analogy. Imagine you are in a restaurant and you want to order a pizza. In REST API, you need to order a pizza, but you get a pizza, burger, and a coke. This is called over-fetching of data. In GraphQL, you can order only a pizza. This is called fetching only the data you need.
What is over-fetching and under-fetching in theoretical terms ? 🤔🤔
- Imagine having a profile page where you have route
/profile/:idand you want to fetch the user’s name and email. But the API endpoint returns the user’s name, email, address, phone number, and other details. This is called over-fetching of data. - Now, imagine you have a page where you want to display the user’s name and email, but the API endpoint returns only the user’s name. This is called under-fetching of data.
Here in REST API you need to make multiple API routes to fetch the data you need. This is where GraphQL comes into play.
Benifits of GraphQL
- Single Endpoint: In GraphQL, you have a single endpoint to fetch all the data you need. You can fetch only the data you need.
- No Over-fetching: You can fetch only the data you need. No more over-fetching of data.
- No Under-fetching: You can fetch all the data you need in a single API call. No more under-fetching of data.
- Cacheable: GraphQL responses are cacheable. You can cache the responses and use them later.
- Real-time Data: You can fetch real-time data using GraphQL subscriptions.
- Strongly Typed: GraphQL is strongly typed. You can define the types of data you want to fetch.
- Dashboard: You can use GraphQL dashboard to test your queries and mutations.
How to Use GraphQL in Your Next Project
We will be using nodejs and express to create a GraphQL server. We will use Apollo Server to create a GraphQL server.
Step 1: Install the Required Packages
First, you need to install the required packages, after initializing your nodejs server . Run the following command to install the required packages.
1
npm install @apollo/server graphql
Step 2: Create a GraphQL Server
Create a new file called index.js and add the following code to create a GraphQL server.
1
2
3
4
5
6
7
8
9
10
11
12
13
14
15
16
17
18
19
20
21
22
23
24
25
26
27
28
29
30
31
32
33
import express from 'express';
import cors from 'cors';
import bodyParser from 'body-parser';
import typeDefs from './configs/typeDefs.js';
import resolvers from './configs/resolvers.js';
import { ApolloServer } from '@apollo/server';
import { expressMiddleware } from '@apollo/server/express4';
import mongoose from 'mongoose';


async function startServer()
{
    const app=express();
    const server=new ApolloServer({
        typeDefs,
        resolvers
    });

    await server.start();

    app.use(cors());
    app.use(bodyParser.json());


    app.use('/graphql', expressMiddleware(server));

    const PORT = 3000;
    app.listen(PORT, () => {
        console.log(`🚀 Server ready at http://localhost:${PORT}/graphql`);
    });
}

startServer();
In this given code we have used expressMiddleware from Apollo Server to create a GraphQL server. We have also used cors and body-parser to handle the requests.
We can also use a function named as startStandaloneServer to start the server where the express server is handle by Apollo Server itself so need to create a separate express server.
The main heros of this code are typeDefs and resolvers. These are the main components of GraphQL. All the queries and mutations will be handled by single route that is /graphql.
Step 3: Define the Type Definitions
Create a new file called typeDefs.js and add the following code to define the type definitions.
1
2
3
4
5
6
7
8
9
10
11
12
13
14
15
16
17
18
19
20
21
22
23
24
// configs/typeDefs.js

const typeDefs=`
type User
{
    id: ID!
    firstName: String!
    lastName: String!
    age: Int!
    email: String!
}

type Query {
    hello: String,
    getUsers: [User],
    getFromAPI: [User]
}

type Mutation {
    createUser(name: String!, email: String!): User
}
`;

export default typeDefs;
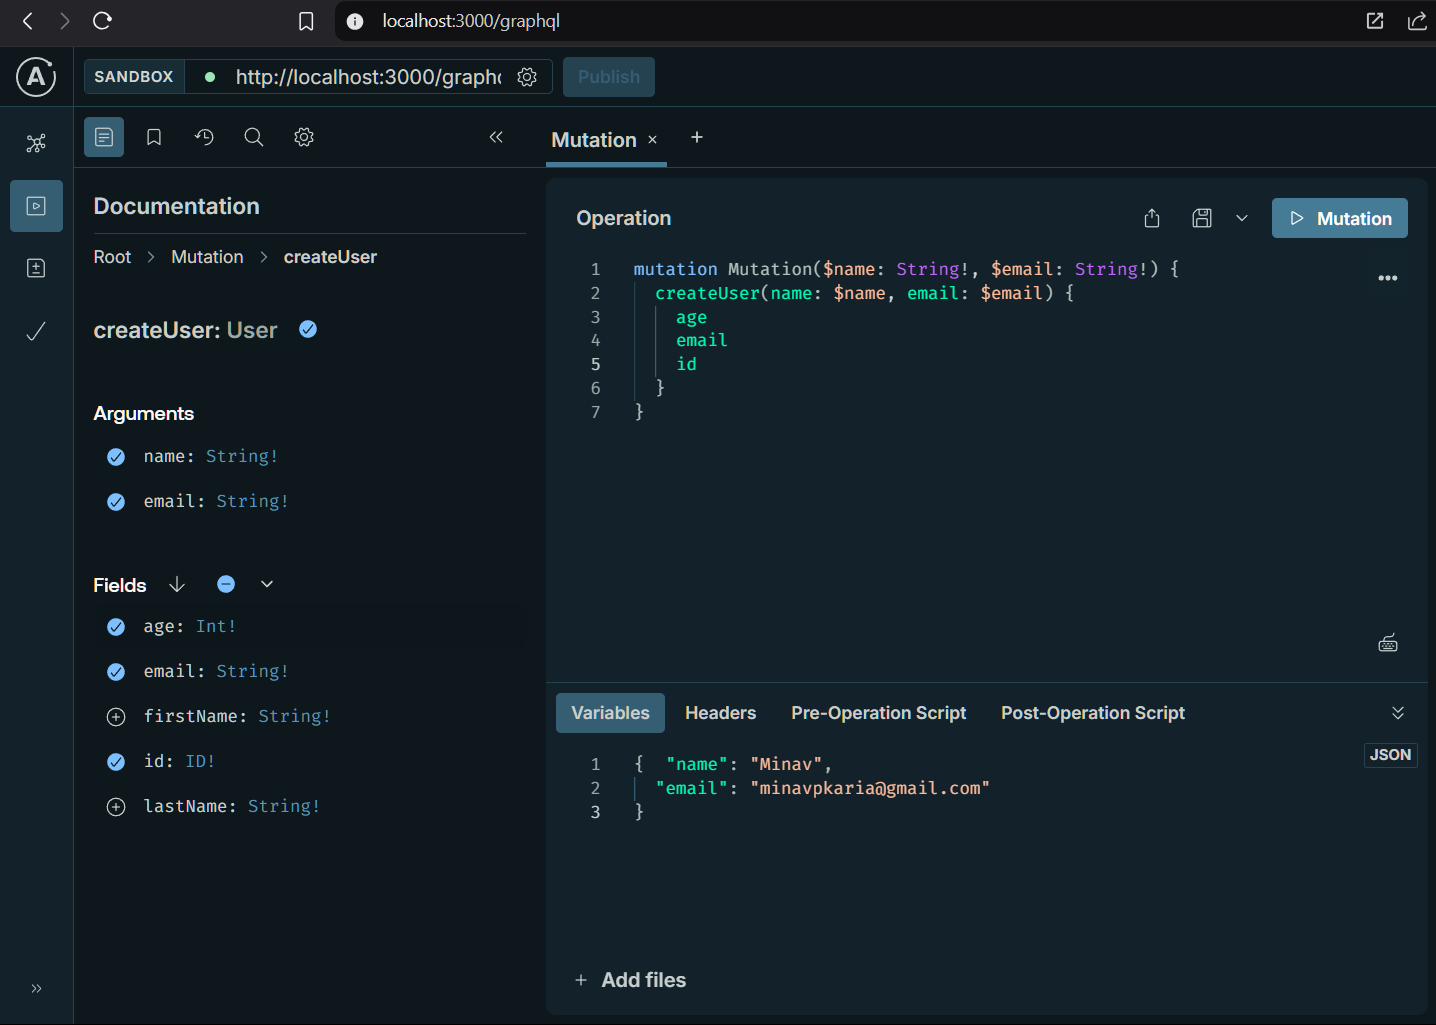
In this code, we have defined the type definitions for the User type. We have defined the fields id, name, and email for the User type. We have also defined the Query type with a hello field and the Mutation type with a createUser field.
Step 4: Define the Resolvers
Now as we have defined the query and mutation types, we need to define the resolvers for these types.
Create a new file called resolvers.js and add the following code to define the resolvers.
1
2
3
4
5
6
7
8
9
10
11
12
13
14
15
16
17
18
19
20
21
22
23
24
// configs/resolvers.js
import axios from 'axios';

const resolvers={
    Query: {
        hello: () => 'Hello world!',
        getUsers: () => {
            return [
                { id: '1', firstName: 'Minav',lastName:'Karia', age:20, email: 'minavpkaria@gmail.com', phone:9929293392 },
            ]},
        getFromAPI: async () => {
            const response = await axios.get('https://dummyjson.com/users');
            return response.data;
        }
    },
    Mutation: {
        createUser: (parent, args) => {
            const { name, email } = args;
            return { id: '1', name, email };
        }
    }
};

export default resolvers;
Let’s divide the code into two parts:
- Query:
- We have defined a
hellofield that returns the string ‘Hello world!’. - We have defined a
getUsersfield that returns an array of users. - We have defined a
getFromAPIfield that fetches the data from the API and returns it.
- We have defined a
- Mutation:
- We have defined a
createUserfield that takes the name and email as arguments and returns the user object.
- We have defined a
Step 5: Start the Server to feel the magic of GraphQL
Now, you can start the server by running the following command.
1
node index.js
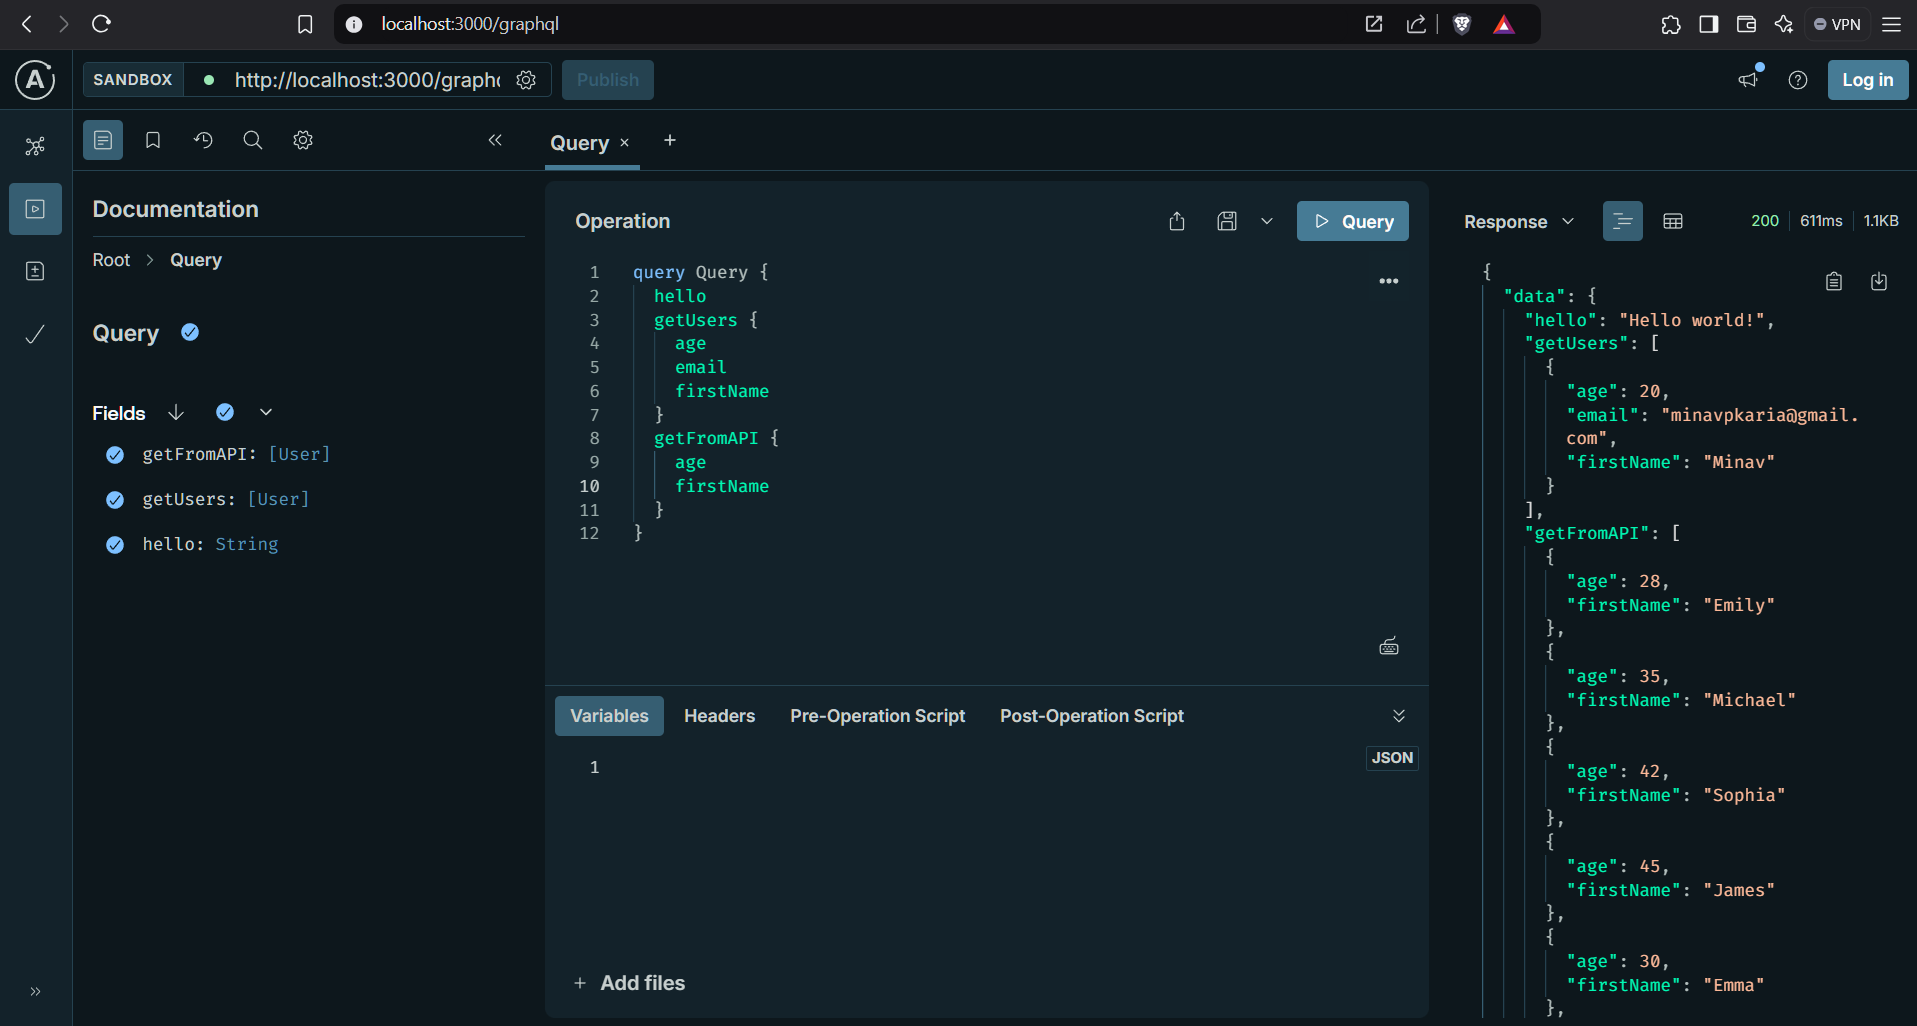
Now, you can open the browser and navigate to http://localhost:3000/graphql to access the GraphQL playground. You can test your queries and mutations in the playground.
Conclusion
There are many more things you can do with GraphQL. You can define custom types, queries, and mutations. You can also use GraphQL subscriptions to fetch real-time data. You can also use GraphQL dashboard to test your queries and mutations.
Real World Use Cases and Features of GraphQL:
- E-commerce: You can use GraphQL to fetch product details, user details, and order details.
- Social Media: You can use GraphQL to fetch user details, post details, and comment details.
- Real-time Data: You can use GraphQL subscriptions to fetch real-time data.
- Dashboard: You can use GraphQL dashboard to test your queries and mutations.
- Custom Types: You can define custom types, queries, and mutations.
- Custom Resolvers: You can define custom resolvers to fetch data from the database.
- Custom Directives: You can define custom directives to validate the data.
- Nested Queries: You can use nested queries to fetch related data.
and many more…
So, what are you waiting for? Start using GraphQL in your next project and feel the magic of GraphQL.
You can refer to the official Apollo Server documentation and Apollo Client documentation for more information.
Happy Coding! 🚀🚀

